Worksheet Crafter User Manual
The user interface of Worksheet Crafter is divided into several sections. See the following picture for the different sections:
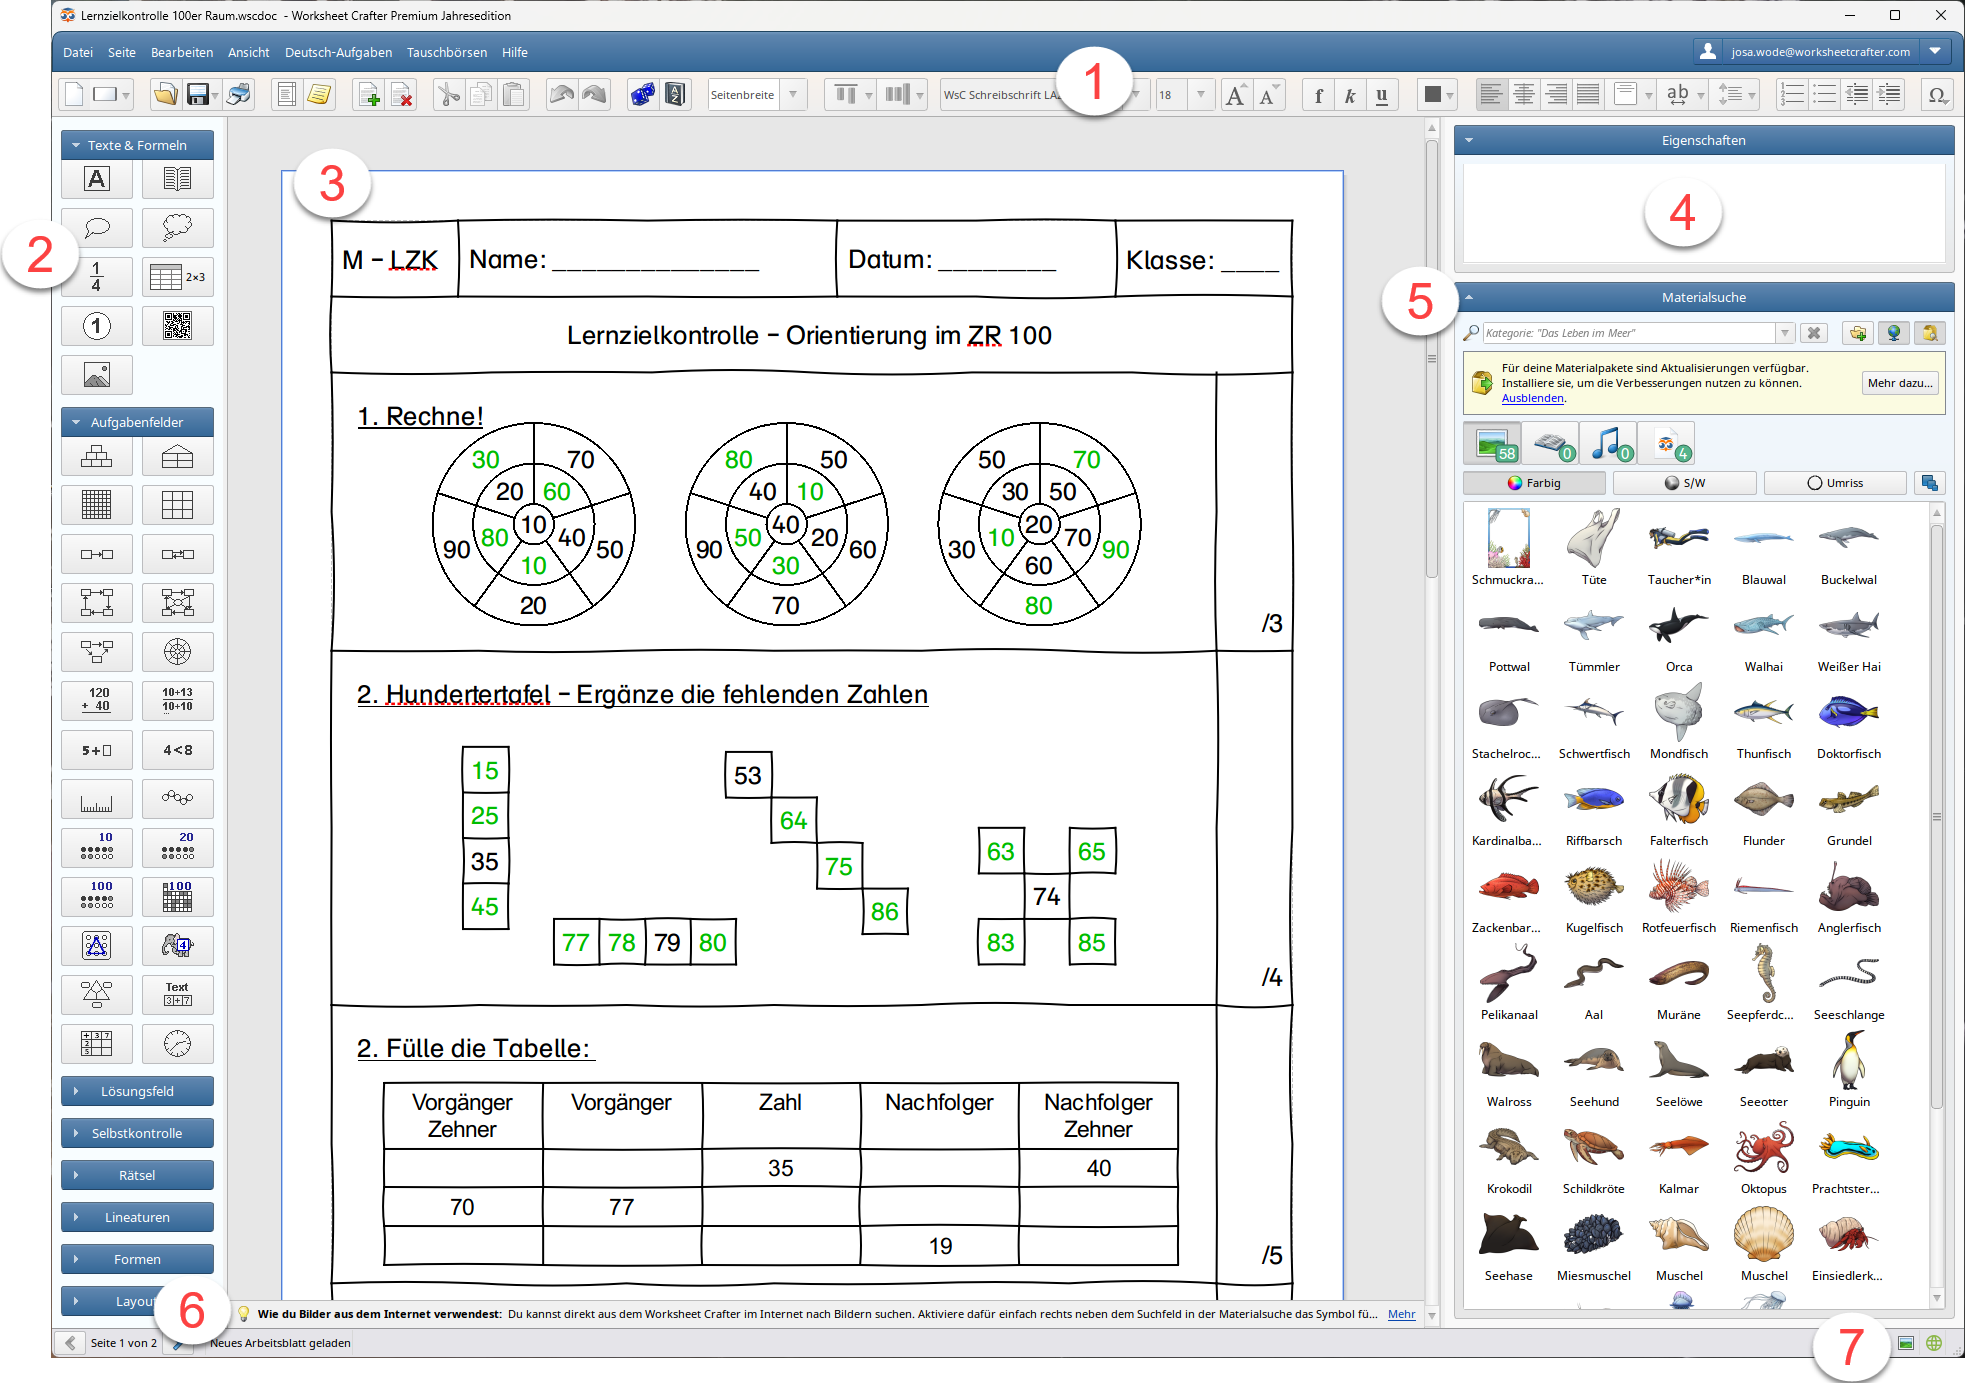
1) Application Menus and Menu Bar
The application menus, e.g. the menu File, contain many useful actions for the respective area. For more information check out the chapter "Application Menus".
Directly below lies the menu bar with the quick menu (see chapter "Quick Menu") for common actions as well as the text format toolbar for changing font settings and other text formatting for the selected item (see the chapter "Text Format Bar").
2) Item Toolbar
The toolbar contains all items available in Worksheet Crafter. Simply drag the mouse to place the items on the worksheet (see chapter "Creating and Deleting Items").
3) Worksheet
In this central area the worksheet can be viewed and edited (see also the chapter "Worksheet"). Usually a worksheet consists of several items which can be selected with the mouse for editing. For more information about working with items on the worksheet see the chapter "Editing Items".
4) Quick Actions Owl Mail Portfolio and Preview
The following actions are provided in the top of the right sidebar:
Put in Owl Mail Portfolio: Use the Owl Mail Portfolio to store your worksheets online and share them with your colleagues.
For digital worksheets and boardwork the additional button Preview is shown: Use the preview to test your interactive worksheets in your web browser.
5) Property Editor
The Property Editor displays the settings of the selected items. Use this section to view and align your settings.
6) Content Browser
Worksheet Crafter includes various clip arts which can be directly placed on the worksheet with the Content Browser. For more information about this topic see the chapter "Working with Clip Arts".
7) Section "Tips & Tricks"
This section contains information and notes which may be of interest for the respective action. Therefore it is always a good idea to have a short glance at the tips and tricks. By the way: Just left click the yellow section to view the next tip.
8) Content Rights Indicator and Online Status Indicator
|
The content rights indicator gives you a quick insight about the content sources for images and sounds in the current worksheet.
Hover over the icon to learn more.
When the icon is grayed out you should check that you have the neccessary rights to use and share the content before sharing the worksheet.
|
|
The online status indicator shows your internet connection status.
If it is green, everything is fine.
Yellow means that some of the last few requests failed, e.g. when using the Online-Marketplace or Pixabay image search.
When the icon turns red, all recent requests have failed. Then it is time to check your internet connection or firewall settings. You find help with connection issues in the (German) FAQ section of our website. If your connection is fine, the red or yellow status could mean that there is an issue with one of our services, e.g. the marketplace.
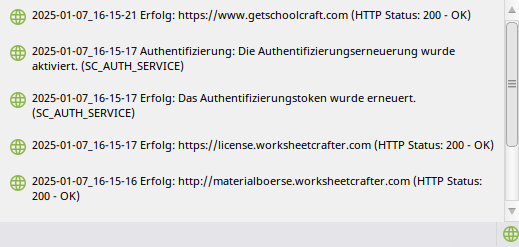
Click on the icon for a detailed event history:
The symbol color of each entry indicates if the request was successful or failed. Click on the history to copy it to your clipboard. This may be of help if you want to contact our support team and insert the information in the mail.
Close the history by clicking outside. |


Keyboard Shortcuts
Worksheet Crafter provides a number of keyboard shortcuts to allow for a smoother workflow.
Click here for the complete overview.