Worksheet Crafter User Manual
|
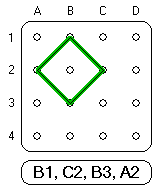
Geoboards are square boards with a grid of n-times-n nails spaced evenly over the board. Geoboards offer students a creative way to explore and experiment with geometric rules and patterns. Despite their simplicity one can realize a huge variety of exercise types with geoboards, including mirroring, rotations, area calculations, perimeter calculations, coordinate exercises and more.
Use the geoboard item in Worksheet Crafter to create these exercises within a few seconds. Additionally the included template library offers a comprehensive set of geoboard configurations to start right away. |
Creating a New Geoboard Item
|
Use the toolbar icon pictured on the left to place a geoboard on the worksheet. For more information about this topic see the chapter "Creating Items".
|
Editing the Geoboard
In comparison to other items the exercise generator of the geoboard will not create the content (=rubber bands) for you, since an automatic generation of rubber bands would rarely match your requirements. Instead you have the possibility to either select the content from an extensive set of predefined templates or to create your own rubber bands very efficiently. The exercise generator will then take care of the complicated part, which is the generation of the exercise based on your rubber bands and the chosen exercise type - e.g. the generation of mirror images or computing the area.
Once you have created a new geoboard item a toolbar will show up next to the item. This toolbar provides a set of tools you can use to create and edit your rubber bands:

In the following the various tools are be described in detail.
Choosing a Predefined Template
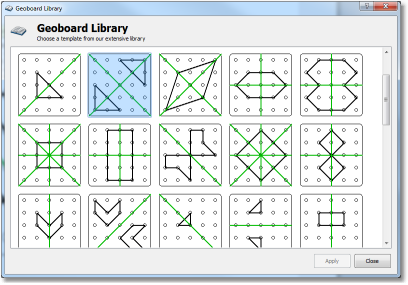
In the upper right corner of the toolbar you will find a button called "Show Templates". When pressing this button a library of geoboard templates will show up. In this library you can use any the templates by performing a double click on them. Please note that the library will only show templates which make sense for the exercise type you have currently chosen.
Creating rubber bands manually
Instead of using a predefined template it is also possible to efficiently create and edit own rubber bands. To do so follow these steps:
1.Click on the toolbar button called "Add" 2.Next click on any nail on the geoboard and keep the mouse button pressed 3.Move the mouse to another nail while keeping the mouse button pressed and release the button once you have reached the nail
With these steps you have created a new rubber band.
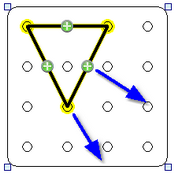
New rubber bands will by default be stretched over two nails only. To extend the rubber band to more nails take any of the green "plus" signs and drag it into the desired direction. You can drag the anchor points of the rubber bands at the nail positions, which are highlighted in yellow color, in the same way. |
|
Editing rubber bands
It is also possible to edit rubber bands after you have created them. You will first need to make sure that the rubber band is in "edit" mode. To do so, select the rubber band with the left mouse button so that it gets highlighted in yellow color. Next click on the toolbar button called" Edit". Alternatively you can switch to the edit mode by performing a double click on the rubber band.
Deleting rubber bands
To delete a rubber band do first select it with the left mouse button and then press the "Delete" button in the toolbar. Alternatively you can press the "Delete" key when the rubber band is selected.
Changing color and fill pattern
The line color of each rubber band is freely customizable. To change the line color press the "Color" button while the rubber band is selected.
The toolbar button called "Filled" lets you choose whether the rubber band shall be visualized with filled interior or not. The arrow next to this button allows you to select the fill color. Filling a rubber band makes sense for certain exercise types such as area computation.
Convenience Edit Methods
The second row in the geoboard toolbar provides a set of convenience methods for editing your rubber bands:

The following methods are available, described from left to right:
Method |
Optional keyboard shortcut |
Moving the rubber band in any of the four directions |
Num Pad: 4, 6, 8 and 2 |
Rotating the rubber band around the geoboard center |
Num Pad: 7 and 9 |
Mirroring the rubber band at any of the four mirror axes |
|
Uniform scaling of the rubber band |
Num Pad: Plus and Minus |
Moving a rubber band is also possible with the mouse. To do so click on the desired rubber band with the left mouse button and move it while keeping the mouse button pressed. Please note that the rubber band needs to be in edit mode for this.
Exercise Generator Properties
When using the Exercise Generator you can select the following settings in the Property Editor:
Width in Nails: |
Width of the geoboard in nails |
Height in Nails: |
Height of the geoboard in nails |
Exercise type: |
Specifies what kind of exercise you want to realize with the geoboard. A detailed overview of the available exercise types is listed below. |
Dependent on the chosen exercise types additional properties may show up. These properties are self-explaining.
Overview of Available Exercise Types
The exercise generator of the geoboard supports the following exercise types:
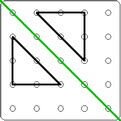
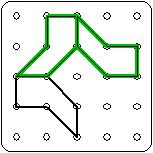
Adding Mirror Images |
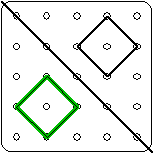
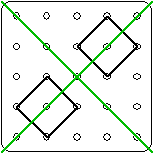
Finding Mirror Axes |
Rotations |
Finding Right Angles |
|
|
|
|
A specified rubber band has to be mirrored at a defined axis.. |
The possible axes of reflection must be found for specified rubber bands. |
A specified rubber band has to be rotated by 90 degrees once or several times. |
The right angles of a specified rubber band have to be determined. |
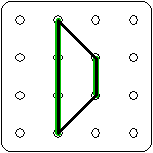
Finding Parallels |
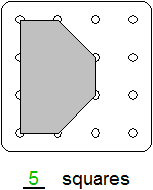
Calculating the Area |
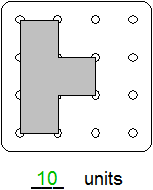
Calculating the Perimeter |
Coordinates Exercise |
|
|
|
|
The parallel lines of a specified rubber band have to be determined. |
The area of a specified rubber band has to be calculated. |
The perimeter of a specified rubber band has to be calculated. |
A rubber band has to be drawn according to the coordinates.. |
The Geoboard in the Manual Mode
In the manual mode you still have access to all predefined templates and editing capabilities. You can use the manual mode e.g. to create templates for your students.
